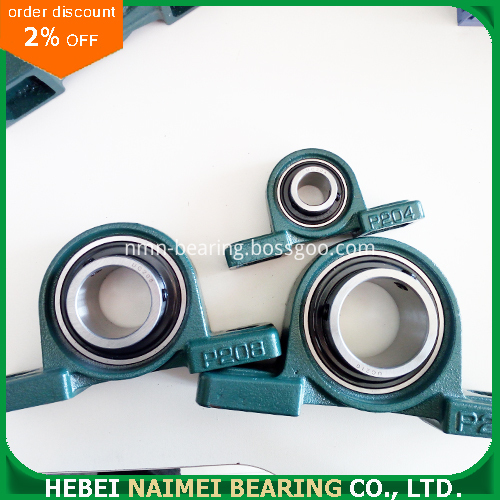
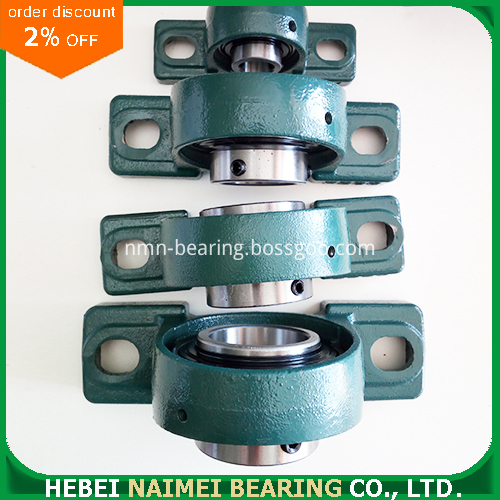
UCP Pillow Block Units(ucp pillow block bearings): Pillow block bearings,insert bearing with housing, flange bearing units, and plummer block all consist of a housing with a bearing mounted in it. They are available in a variety of materials, mounting configurations and various bearing features.It is simple to mounted bearing,each mounted unit acts as a system to position the bearing securely for reliable operation. Pillow block bearing is widely used in various of machinery, especially in food machine,and they also can be used into pharmaceutical machinery, conveyering systems, photo & film processing machinery, spin machine,dying & printing machinery,etc.
Maintenance:
Clean the bearing will be removed check, use methods such as taking pictures first record appearance. In addition, to confess the residual amount of lubricant and lubricant sampling, and then clean the bearing. Examination and distinguish can remove the bearings from scratch using, check on the accuracy for the standard, rotating accuracy, internal clearance and collaboration, raceway surface, insist on frame and seal rings etc. About the inspection effect that can be used by bearing or known bearing. Sentenced to standard according to the mechanical function and importance as well as other inspection cycle, etc. If you have the following injury, bearing shall not be applied from scratch, it is necessary to exchange.
Ucp Pillow Block Units,Ucp Series Pillow Block Bearing,Ucp Series Mounted Bearing,Pillow Block Spherical Bearing Hebei Naimei Bearing Co., Ltd. , https://www.nmn-bearing.com
figure 1 
figure 2 
image 3
Bearing Unit
No.
Shaft Dia
Dimensions(mm)
Weight
(kg)
d
mm
h
a
e
b
S1
S2
g
w
n
Bi
UCP202
15
30.2
127
95
38
13
19
14
62
11.5
27.4
0.63
UCP203
17
30.2
127
95
38
13
19
14
62
11.5
27.4
0.60
UCP204
20
33.3
127
95
38
13
19
14
65
12.3
31.0
0.66
UCP205
25
36.5
140
105
38
13
19
15
71
14.3
34.1
0.80
UCP206
30
42.9
165
121
48
17
21
17
83
15.9
38.1
1.30
UCP207
35
47.6
167
127
48
17
21
18
93
17.5
42.9
1.60
UCP208
40
49.2
184
137
54
17
21
18
98
19.0
49.2
1.83
UCP209
45
54.0
190
146
54
17
21
20
106
19.0
49.2
2.18
UCP210
50
57.2
206
159
60
20
25
21
114
19.0
51.6
2.68
UCP211
55
63.5
219
171
60
20
25
23
126
22.2
55.6
3.27
UCP212
60
69.8
241
184
70
20
25
25
138
25.4
65.1
4.52
UCP213
65
76.2
265
203
70
25
29
27
151
25.4
65.1
5.70
UCP214
70
79.4
266
210
72
25
31
27
157
30.2
74.6
6.66
UCP215
75
82.6
275
217
74
25
31
28
163
33.3
77.8
7.40
UCP216
80
88.9
292
232
78
25
31
30
175
33.3
82.6
9.00
UCP217
85
95.2
310
247
83
25
31
32
1870
34.1
85.7
11.00
UCP218
90
101.6
327
262
88
27
33
33
200
39.7
96.0
13.00
Bearings type
Pillow Block/ Mounted
Brand
NMN / OEM
Precision Rating
P0(ABEC-1), P6(ABEC-3), P5(ABEC-5), P4(ABEC-7)
Vibration and noise level
Z1V1, Z2V2, Z3V3, Z4V4
Clearance
C0, C3
Housing Shape
T, P, FC, F, PA, PL
Housing Material
Cast Iron
Bearing Material
GCR15, Carbon Steel
Main markets
Europe, South America, USA, Southeast Asia and Middle East
Quality
Standard quality ISO9001
Place of origin
China


Large cone surface machining adjustment method and spindle
The processing of the small cone surface workpiece, the process basically the use of the diameter of the spindle using a dial gauge (dilometer) calibration grinding machine rotary table or lathe tool holder angle, to achieve processing. However, if the above method is adopted for a workpiece with a large-angled conical surface, the depth of the table is limited, resulting in that the moving distance of the tool rest or the rotary table is too small, and the angle accuracy of the calibration is difficult to guarantee. The stepped mandrel and face mandrel introduced in this article can overcome the above defects. Both mandrels use their own difference, use the accuracy of the dial gauge to calibrate the table or tool holder angle, high precision, and mandrel manufacturing is simple. low cost. 1 Stepped mandrel The mandrel is generally used for workpieces with a unilateral angle of less than 45°. The mandrel uses its own height difference to replace the lack of a depth indicator for dial gauges. And using the accuracy of the dial gauge, the correct angle of the large-angle tool holder or rotary table can be corrected to ensure the correctness of the workpiece.