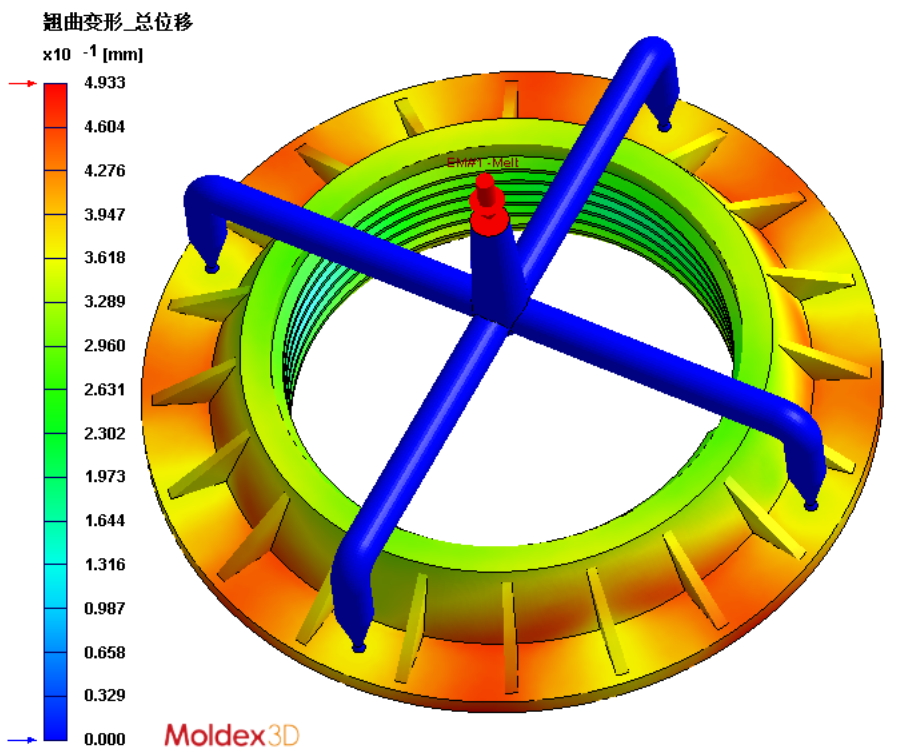
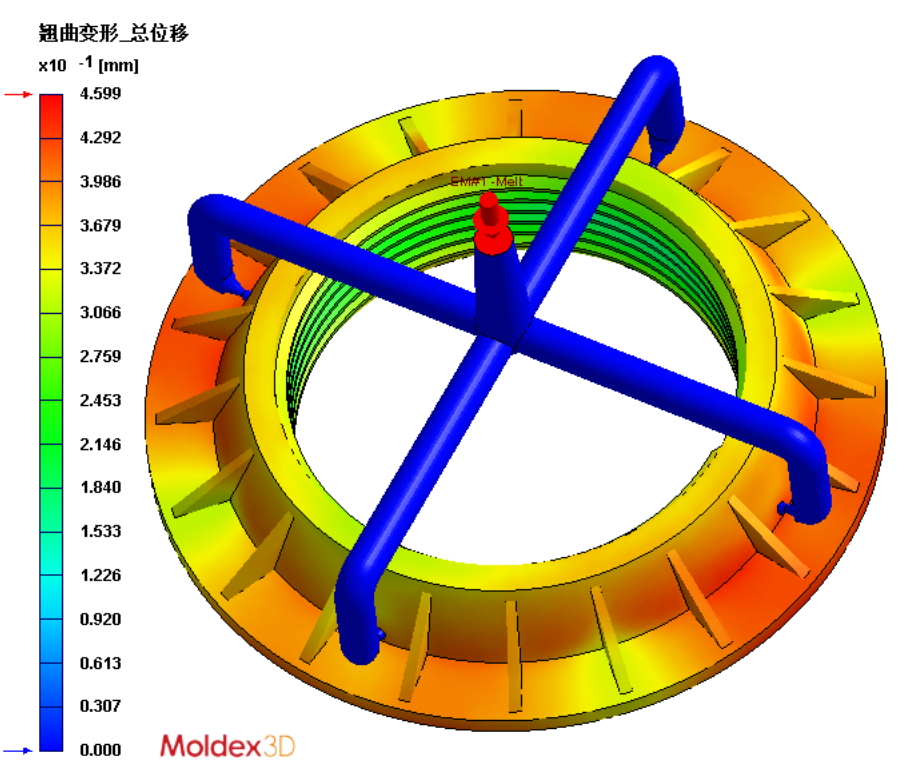
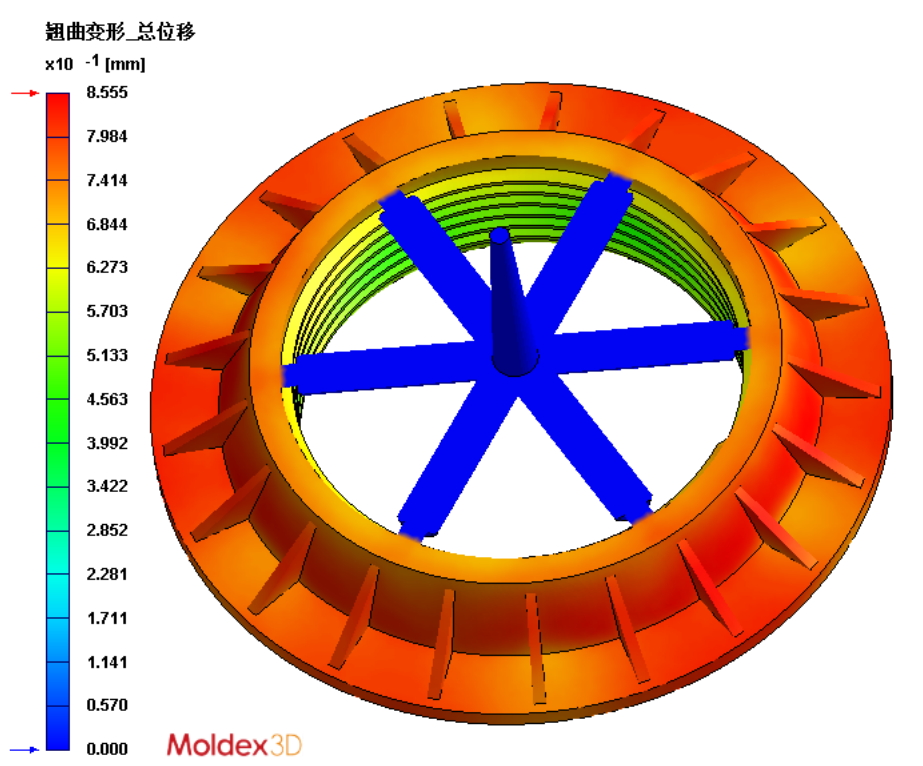
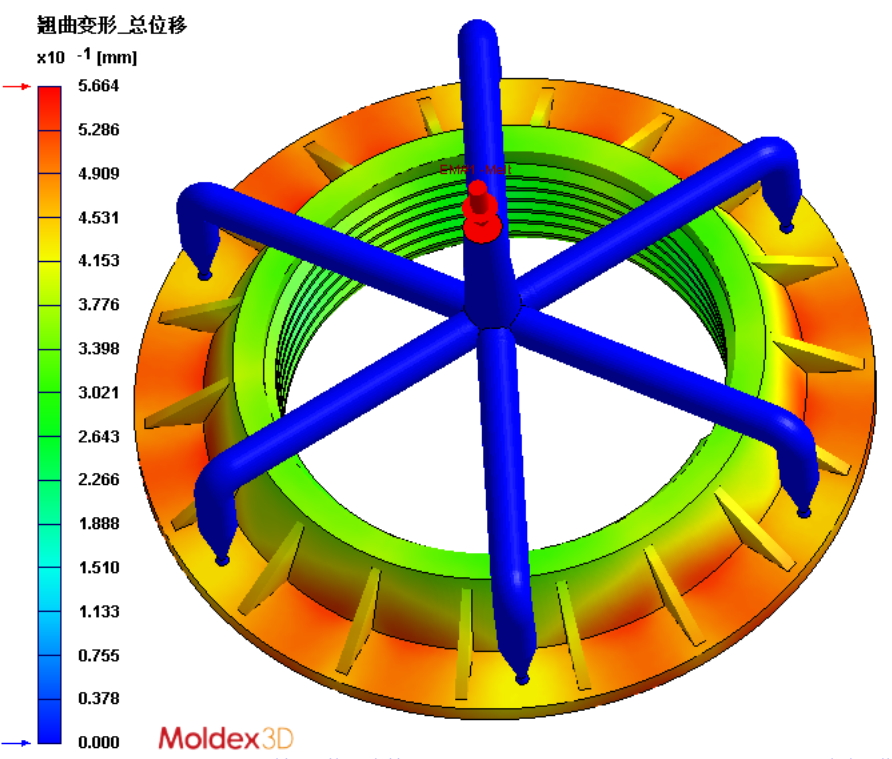
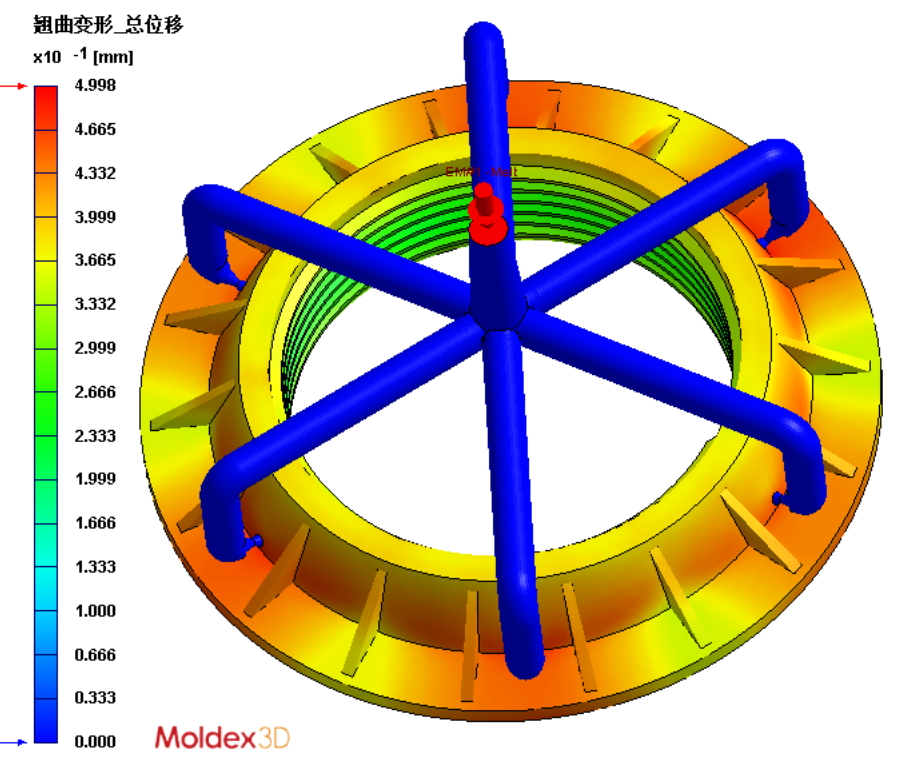
Containers made from polymer-based composite materials have many advantages. They are toxic free, durable, in compliance with hygiene standards, and highly resistant from leaking, corrosion and chemicals. Therefore, their applications can be found in various industries. In this case, the storage container is made from composites materials and consists of a container body and a screw cap. The thread dimension of the screw cap is critical to the part quality and performance and the gate design has significant impact on the thread dimension. Beijing University of Chemical Technology (BUCT) PhD students used Moldex3D to investigate multiple gate designs to meet tight dimensional tolerances. Utilizing Moldex3D Advanced Package to evaluate the gating designs to improve deformation and avoid costly mold rework The container cover product (Fig. 1) in this project has a 2.5-inch NPSM (National Pipe Straight Mechanical) screw thread design and the goal is to make the dimension to meet the tolerance requirement. Meanwhile, a practical standard operation procedure should be built as a long term target of the product lines. The geometry of screw thread is complex and requires high precision. Moldex3D provides true 3D mesh modeling and solvers that assist CAE specialists to directly run analysis in 3D simulation software without simplification. The measure node is a useful function that helps extract the displacement data from warpage simulation results for the critical portion of the screw thread. In addition to the original design, there are other five gating designs proposed. Design changes are gate numbers, types and positions. The measure nodes were pre-placed on the mesh model (Fig. 2) for checking displacement and dimension examination after obtaining analysis results. According the analysis results (Fig 3), the overall shrinkage distribution of the 6-gate design is the most uniform. It means more gates will lead to more uniform shrinkage and better roundness. Moldex3D provides a wide range of simulation tools that allow users to compare and evaluate the quality of different part designs. According to the simulation results (Fig. 4), the 6-gate design has less product displacement than the 4-gate design. Regarding the gate type, the tunnel gate shows lower displacement than other two gate types. Therefore, the combination of 6-gate and tunnel gate design is the best among all designs. In addition, the structure design change is applied to the part (Fig. 5) and the displacement result (Fig. 6) shows the part shrinkage becomes more uniform and can achieve all specification requirements. The major benefit of using Moldex3D in this case is to verify and optimize the part and mold design without expensive mold revisions. As a result, the scrap rate has been significantly reduced from 90% to 5%, effectively reducing material waste and manufacturing costs. Precision Stamping Die Parts Processing Precision Stamping Die Parts Processing,Precision Parts Mould Processing,Stamping Tooling Design,Progressive Die Components Artisan Precise Molds co.,Limited , https://www.artprecise.com

Executive Summary
Challenges
Solutions
Benefits
Case Study
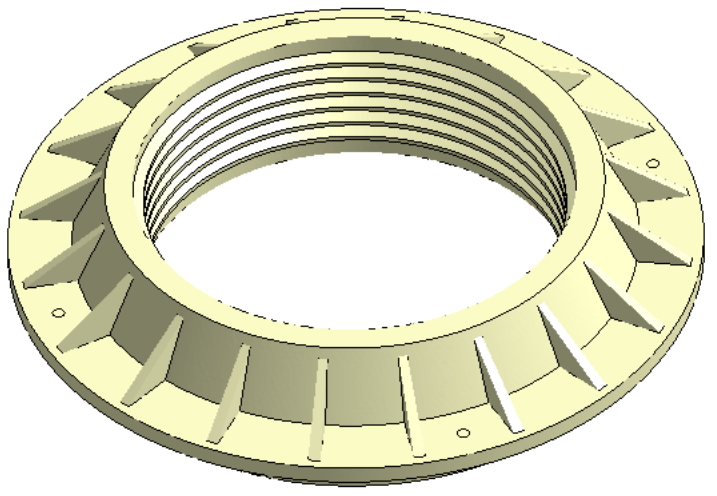
Fig. 1 The geometry of the container cover

Fig. 2 Mesh model with measure nodes
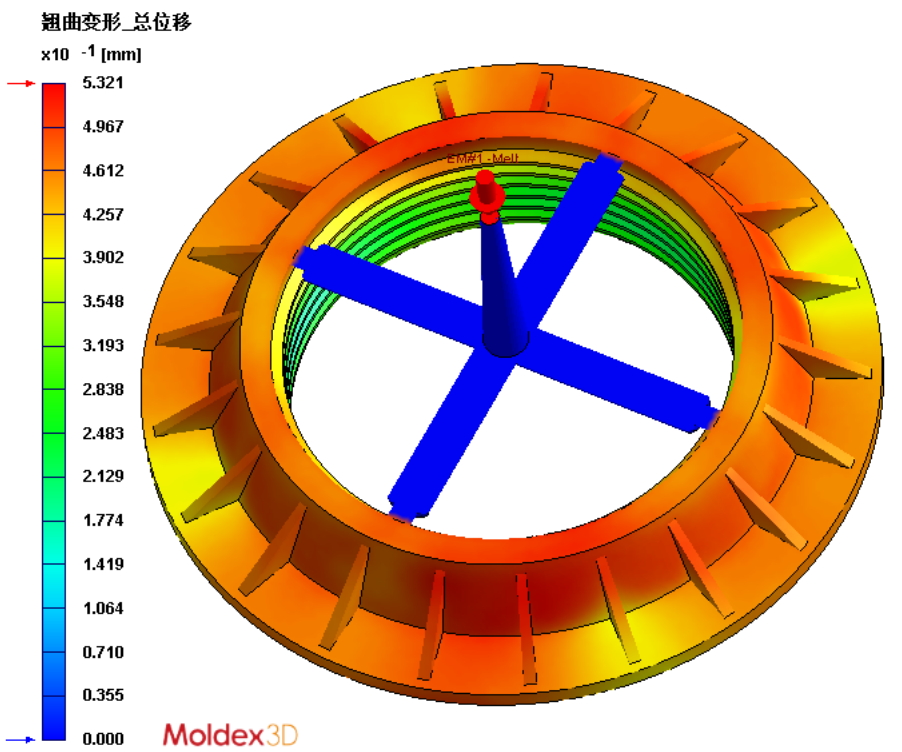
Original Design (Edge Gate x 4)
Revised Design 1 (Pin Gate x 4)
Revised Design 2 (Tunnel Gate x 4)
Revised Design 3 (Edge Gate x 6)
Revised Design 4 (Pin Gate x 6)
Revised Design 5 (Tunnel Gate x 6)
Fig. 3 Warpage displacement results of different gate designs
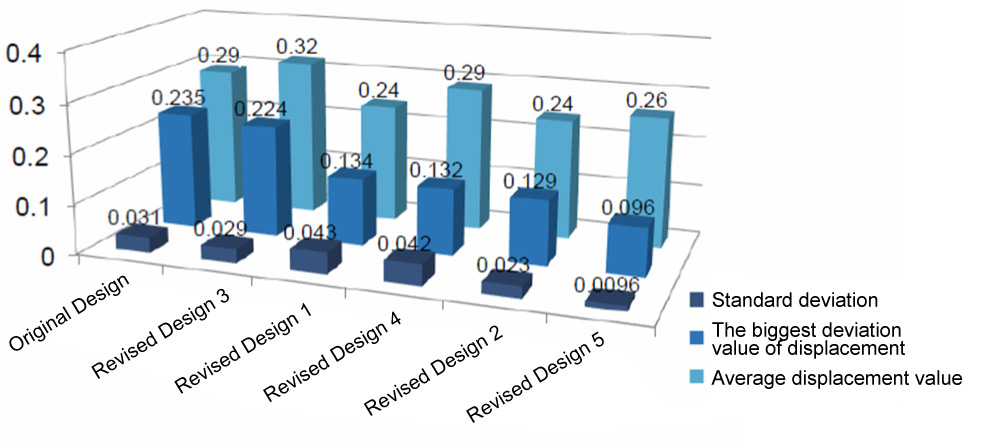
Fig. 4 Node displacement results comparison among different gating designs

Fig. 5 The part structure has been changed. The part thickness at the downside of the original design (left) has been reduced to 1 mm (right).

Fig. 6 Node displacement result comparison between original geometry (left) and revised geometry (right)
Results
Controlling Dimensional Accuracy of a Plastic Screw Cap with Moldex3D Simulation
Customer Profile